The overall onboarding process is divided into four major steps. This includes completing your registration, creating your discovery page, updating your calendar, and connecting your payment gateway – Stripe and Payoneer account.
1.Completing registration – This process is completed when the user sign’s up on the Welance platform.
2.Creating discovery page – Discovery page allows users to create their online presence, this includes creation of unique URL, brief profile, linking their social media accounts and listing down of the services offered by them.
The discovery page can be accessed by clicking on Build your business >> website
The discovery page options provide a list of ideal information one should add in their discovery to stand out and generate more leads, an ideal discovery page should be 100% complete.
3.Updating your calendar – Welance allows users to select their preferred meeting options – either Google meet or Zoom. Users can connect their Google or Zoom accounts and update their availability in Welance. Unique URL is generated for user’s calendar which gets added to user’s discovery page and can be used by users to share with their clients for viewing their availability and booking a time with them.
Users can update their availability though Build your business >> Calendar Select and connect your preferred platform for online calls
Update availability and your time zone
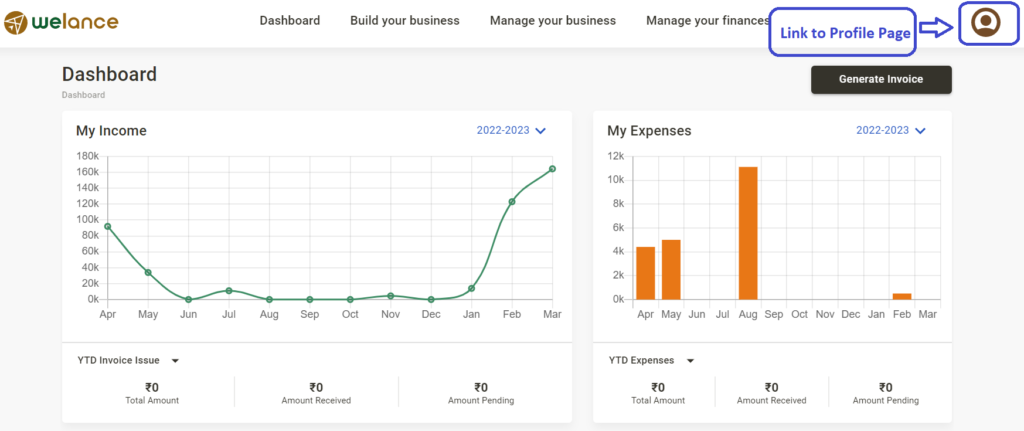
4.Connect your Stripe and Payoneer accounts – Connect your existing or create a new merchant account on Stripe and Payoneer. Stripe and Payoneer enables you to directly collect payment from your clients into your account. The overall process is completely digital and merchant account gets activated in less than 30 minutes
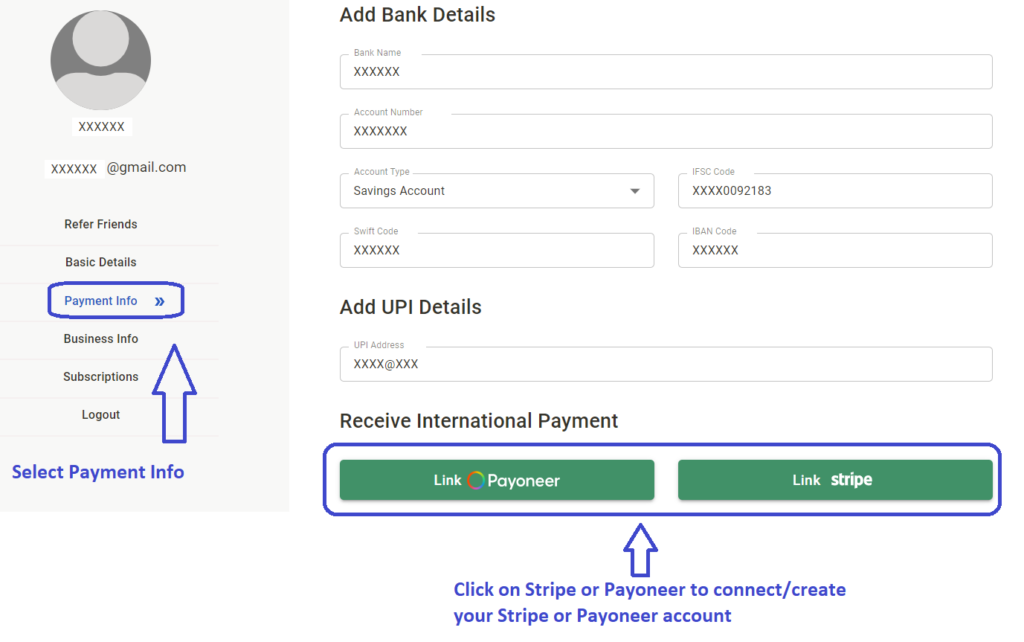
Navigate to Profile >> Payment Info
Select payment info option and connect/create your Stripe and Payoneer accounts.